Suppose you think begin of the hat photography is easy, but you’ve never attempted to make it happen.
Caps, in reality, are constructed of various materials, are of different dimensions and shapes, and are adorned with tiny elements that significantly complicate the photography process.
If you’re looking to become an expert in the field of hat photography, then you must learn the following tips.
You’ll learn how to capture photographs of various hats and get excellent results.
Before you do hat photography, you should ensure that they are clean and dry. A hat is a great way to add visual interest to a shot but keep them away from the main subject.
One great way to showcase a hat is to use a coat rack or pin board, which also gives off a relaxed, trendy vibe.

If you use a hat with a brim, make sure you use an iron or steamer to eliminate wrinkles on the bill. You may also want to invest in a special hat box to store the hat after cleaning it.
If you use a hat with a brim, make sure you use an iron or steamer to eliminate wrinkles on the bill. You may also want to invest in a special hat box to store the hat after cleaning it.
Photographing a hat isn’t always easy. The shape of the hat, its color, and its material all require different techniques.
The best way to snap a cap is to find a model representing your brand.
For example, if you’re selling a hat with cowboys, you’ll want to use a rural model.
You can also use the same technique when photographing other types of products, including other headwear.
If you’re starting out in the world of hat photography, you’ll need to learn how to set up a photo studio.
It’s important that the lighting and color output remain consistent to ensure that all hats appear the same.
This is particularly important for social media purposes, where hats are likely to be shared.
The following tips will help you setup a photo studio for hat photography.

The first step to set up a studio for hat photography is to choose a location where you can position your mannequin.
The best location for this will depend on how much space you have and the materials you have.
If you have limited space, a white backdrop will be helpful.
Also, ensure that your mannequin is at eye level or slightly higher to avoid casting harsh shadows on the hats.
You can also use a reflector board to minimize shadows cast to the right side of the mannequin’s face.
The second step to preparing a studio for hat photography is choosing a model.
Most people just starting out in hat photography tend to focus on one angle and a single color.
This approach can be problematic as people are looking for as much detail as possible.
Likewise, different hats have different features.
They may have different shapes and sizes, different decorations, or additional accessories.
By focusing on specific details, you can visually differentiate a trilby from a boater.
One of the most important parts of hat photography is choosing the best product photography backdrops.
It should complement the hat, not detract from it.
Choosing a dark background will make the white feather of the hat virtually invisible, while using a light-colored background will help all the colors in the hat pop.

A white background will look good with most types of products, so it is a great choice for eCommerce websites.
A white background also allows for more editing options.
For photographers on a budget, a white roll of paper can be used as a backdrop.
This simple setup will create a fresh look while focusing attention on the subject.
It is best to use a light that is 3-stops higher than the subject light.
If you are planning to take a hat photograph, you should know how to shoot it.
You should position your model and hat in a way that the hat is not overpowered by the person wearing it.
You can also use a foam mannequin head to hold the hat in place.
Select the background carefully, making sure it compliments the hat and draws viewers’ attention.
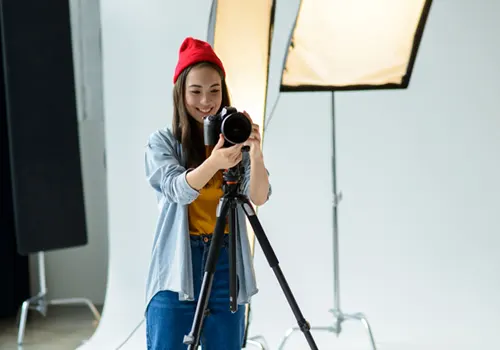
The first step in shooting a hat photo is to set up the background.
You can do so by arranging a white backdrop that covers the top half of the model’s face.
You can also position a camera tripod in line with the placement of the hat.
You can also use models, but you need to keep in mind that they are very expensive and may detract from the final product.
For a cheaper alternative, you can use a foam mannequin head.
These are more convenient to use and come with an invisible mannequin effect.
If you want to take pictures of hats, there are some tips that you should follow.
Props for hat photography can vary greatly.
You can use a variety of different props, such as flowers, confetti, smoke bombs, and more.
Some of these items are also available in many locations.
For example, you could use petals for hat photography.
You can even use a crystal ball, which looks great in photos.

When choosing props for hat photography, consider the subject’s personality.
It’s best to experiment with different props during several sessions before choosing the one that works best for your subject and the location.
You can also try using an invisible mannequin if you don’t want to work with a live model.
Ghost mannequin photography is the best option for the beginner or if you are having a limited budget.
You can also try using an invisible mannequin if you don’t want to work with a live model.
The most important thing to remember when shooting hats is to make sure that the focus is on the hat.
You can buy different sizes of foam mannequin heads to use.
You can use a Mannequin for a variety of heat-related purposes.
This versatile and inexpensive item can be used to photograph hats straight on a mannequin or as if the hat were being held in your hand.
In addition, you can use various product photography editing techniques to create an invisible mannequin.
This article will explore three common uses for a form of hat product photography.
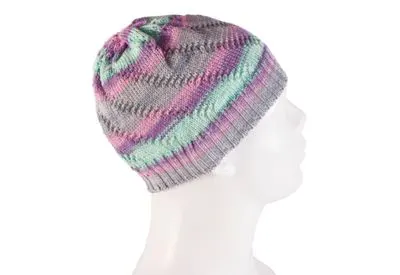
When using a mannequin, you can choose a white background.
This allows you to remove the background easily without damaging the mannequin.
To remove the background, simply select the “Refine Edge” tool in Photoshop.
If you don’t have a DSLR, a smartphone will work just fine.
A white background will also allow you to shoot in low-light conditions.
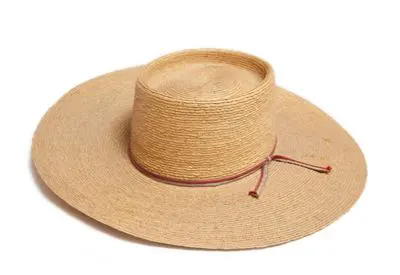
Product photography editing can take many hours.
If you’re not comfortable making all the edits yourself, leave the work to photo editing company, who will examine your images to identify the weak spots fixing them
In general, you should remove all obvious obstructions and imperfections.
Which means you’re guaranteed to receive images that are suitable for reliable trading platforms.
Many people just starting out with hat photography focus on just one angle when they shoot their product.
But the truth is that people like to see as much detail as possible.
Even the best lens for product photography won’t capture all the details on a hat from one angle.
Different hats can have varying shapes, sizes, decorations, and other accessories.
A focus on these details can help you to visually differentiate a trilby from a boater or vice versa.
One of the latest trends in product photography is 360 degree photographs.
Increasingly, this type of product photography has become a popular choice in many industries.
However, it is also a costly endeavor.
The more images you want to capture, the longer it will take the camera to rotate around the subject, and the cost will go up accordingly.
A 360 degree image is not a simple task to create, but there are a few things you can do to ensure your photos are as professional as possible.
First, use a photo editing program to refine the photos.
Depending on the software, you can use Photoshop or other image editing software to refine the photos.
A white background will help the photos stand out in the background.
To achieve a neutral background, use RGB values of 255 and white in the hat’s color.
Next, crop and mask background objects. Lastly, adjust the color balance and levels accordingly.
Proper lighting is critical for hat photography.
Lighting the hat from several angles and with the right amount of exposure is essential to a professional photo.
Proper lighting is important to avoid creating a shadowy look, and it should be even throughout the image.
A good DSLR camera is recommended, as it has optimal settings.
Read on to learn more about lighting for hat photography. Listed below are some tips for lighting a hat.
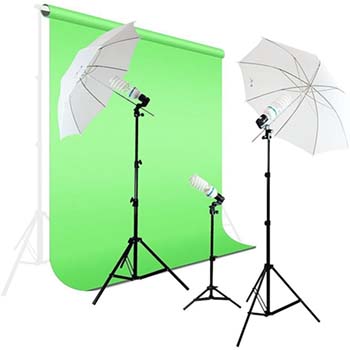
Before you begin shooting, prepare the hat for photography.
Make sure it is clean and remove any stickers or tags. Then, prepare your camera.
A good camera for hat photography is the Sony a6400.
Another affordable camera to consider is the Panasonic Lumix FZ80K or the Canon 90D.
Once you have your camera, make sure to clean the lens.
It is important to use the right lighting for hat photography to achieve a professional look.
If you’re into product photography, you need a high-resolution camera.
With more people turning to the internet to buy products, you’ll need high-quality pictures to sell the items.
The Sony Alpha A7R IV is a top-notch camera for product photography.
Its 61 Megapixel full-frame sensor produces images with unprecedented resolution.
This camera is designed for professional photographers, so you’ll find many customizable controls to suit your needs.
Hat product photography can be quite tricky, since the hats are made of different materials, sizes, and shapes, and they’re decorated with miniature elements.
To make your career easier, you’ll need to learn several tips and techniques.
You can opt for expensive studios or shoot in a safe, open space.
However, if you’re on a budget, there are plenty of ways to capture high-quality hat photos on your own.

Besides the lens and sensor, the resolution of your camera is also important.
High resolutions hat product photography tend to give you larger pictures, but when used for eBay, they’ll be scaled down.
