Written by: Ronald Jonas | Updated on: January 01, 2026
If you are planning to open your own online store, you’ll need to do good product photography for it.
Whether you’re starting out as a photographer or working on a commissioned shoot, you need to have the right camera to capture the best images.
Products Photography have become a huge part of selling and online retailing, and it’s only getting bigger.
The ease of shopping online has made it a popular way to make purchases, and a business without exceptional images could be losing sales.
However, high-quality product photos also helps brand companies with their overall branding and success.

The goal is to provide prospective buyers an entire picture of what the product offers.
Photography of products is important for e-commerce, because without a clear representation of the item, the customer may not trust the company and won’t buy it.
The photos should be carefully designed to highlight the item, express its value, and be true to the actual product.
Hopefully, this article has been helpful in answering some questions you might have.
photography of Product is an art form that uses photographs of products to illustrate their features.
Until the 1950s, most product images were created using drawings or illustrative renderings.
Although they were still used widely in the fashion industry, photographs are increasingly becoming the standard way to present products.
CGI has revolutionized the field and can now create extremely realistic pictures.
However, the history of commercial photography has many more twists and turns.
Until the 1950s, most product images were created using drawings or illustrative renderings.
Let’s take a look at some of the key milestones in the development of the medium.
The most common technique used in the history of product photography is the studio photograph.
These photographs feature an inanimate object in a controlled environment without any human element.
It is most often used for advertising, food, fashion, and e-commerce.
However, studio photographs require special skills and equipment to achieve a professional result.
The objective of these images is to grab the viewer’s attention and encourage them to make a purchase.
A history of product photography dates back to the early 20th century. It was a way to highlight different features and benefits of a product.
Before you take any product pictures, you must have a proper setup for the photos. Props are essential for enhancing the pictures and capturing the mood.
However, props are not sufficient – you should also take test shots before taking the final shot.
Most cameras nowadays come with automatic modes, but you will get crisper photos if you focus manually. Many smartphones come with good-quality lenses.
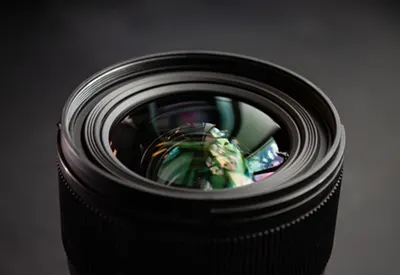
Macro lenses are ideal for small items. Other types of lenses work well with different types of products.

For example, a 24-70 mm lens is great for product photography. However, if you want to capture the perfect shot, you can spend a little extra money on a better lens.
A tripod is not a necessity, but it can help to get sharper pictures even at slow shutter speeds. Also, use a diffuser to soften the light in the scene.
Getting the right photo is essential for your online store’s success.
It can make a huge impact on the impression a potential buyer has of the product.
In fact, according to eBay Research Labs, good pictures can double conversion rates.
Besides, eye-catching, close-up shots of your products will increase the chances of a sale.
Improve the quality of your images by using quality lighting and a complementary background.
Product photos should be the main focus of a picture.
Backgrounds should be solid or light colors.
Products should not be over-processed.
Google recommends using back, close-up, and main images.
The product should take up at least 75% of the total image, preferably 95%.
It will also help to reduce the word count on the product page.
Your photo will show most details about your product by using many angles.
Using images can showcase the prime features of a product and make it stand out against the competition.
However, subpar images make it difficult to convert potential customers.
Products images should be informative to help customers understand the product’s features and variants.
Besides, good photography can increase your sales.
Also to boosting sales, good product images build brand identity and company reputation.
A picture is worth a thousand words, so make sure it’s good!
Product Photography is an Art.
Taking high-quality photos of products can increase sales for any business.
It isn’t easy to sell one single item when your images don’t reflect the product’s value.
Additionally, it is costly to hire a professional photographer.
It is easier to learn how to take your photos.
Learn to take photos of products and edit them to best showcase your products.
Create your portfolio. A portfolio is a collection of your best shots.
It is important to use keywords in your website content to be found by search engines.
If you live in Ridgewood, New York, you are more likely to be found by locals.
Use keywords with “buying intent” so that potential clients will see your website when they search for product photography.
Your portfolio aims to show your versatility and get clients.
A successful product photography business depends on the proper lighting.
A product photographer needs to set up a simple lighting setup.
This includes a fluorescent bulb as the main light source, bounce boards, diffusers and reflectors, as well as a white balance card.
A product photographer should practice taking test shots before working with live products.
This step is crucial but does not require much time.
Lighting is the most important factor in a product photography shoot.
Proper lighting is vital to make the product pop.
Overhead lights can make products look moodier, while light modifiers reduce shadows.
The lighting in a product photography studio should also be as consistent as possible so that the product will be recognizable.
Once you have the lighting set up, it is time to get the photo editing done.
You can download free software to enhance your images.
Once you have your setup ready, you can move on to shooting the products.
Product photography requires a dedicated studio, but it doesn’t need to be huge.
The space should be big enough to accommodate your products and the equipment you’ll need.
Make sure you have plenty of space to move around to work effectively.
If possible, mark your setup with tape to know where everything is when you need it.
The amount you charge per product depends on the amount of set-up time and complexity.
Although it might seem cheap to shoot a product using a few products, you will likely get very little return.
For this reason, you should set a maximum number of images for a single order and offer a wholesale discount.
It is important to keep in mind that larger objects might must extra equipment or manning, which will increase your cost.
Product photography can be profitable if the images are used as part of a marketing strategy.
Pricing for a product shoot depends on many factors, including the type of product and the photographer’s experience.
It is also important to note whether you’re hiring an independent photographer or a photography studio.
The price for a product photography shoot will likely depend on these factors and the number of products you’re photographing.
Pricing for product photography is a delicate issue.
Many companies charge thousands of dollars for the same photos, but they don’t know how to price the photos themselves.
Moreover, product photography can take several hours to complete.
In addition to the time you spend on photo-shooting, you may have to provide stylistic support for your photos.
For any kind of photography camera is the basic requirement.
Without that even you can not think about the photography at any level.
There are numbers of DSLR available in the market with having advance technology in 2026.
While you are choose camera you need to check your requirements.
If you are a beginners so you can choose good mobile with camera as well.
So let’s discuss about the important of camera for photography.
Below I have also explain that which camera you need, how many megapixel is required and so.
It will clear all your dough about the camera that you need for product image shooting in 2026.
While you starting with any photography first you think about camera.
You will think that which camera is good, how many pixels required and many more.
In detail I have tried to clear all the dough regarding the same.
The Panasonic Lumix G85 is an affordable camera with a 16MP sensor and dust and splash-proof capabilities.
The camera features 4K recording and 5-axis dual image stabilization.
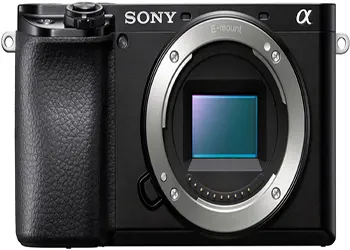
Sony is an industry leader in digital devices and music systems.
So it makes sense to look to them for new product photography camera technologies.
If you are an amateur product photographer, the Olympus OM-D E-M10 Mark IV has excellent sharing features.
The price is reasonable, but it has great performance for personal product photography on eBay.
It comes with a high-quality LCD screen and Olympus lenses, as well as a flip-down screen.
A few other advantages of this camera include its Olympus Micro 4:3 system and a 20MP Four-Thirds sensor.
For quality stills, the camera should have a high-resolution sensor.
A higher megapixel count means better details.
But it doesn’t mean better photos – the quality of stills and videos will depend on other factors.
A camera’s ISO range, low-light performance, and noise reduction are important for the product photographer.
However, megapixel count is not the only factor to consider.
The best camera for product photography is the one that meets your needs.
One question that people often have is how many megapixels I need.
While the more megapixels a camera has, the better the picture quality, it’s important to consider more factors than just the number of megapixels.
Here’s a look at how many megapixels you really need for product photography.
The megapixels are important for cropping and enlarging the picture without seeing individual pixels, but they don’t mean much else.
The first question is: “How much resolution do I need for product photography?”
Choosing a camera with the right megapixels for the job is important because you’ll be printing the images.
High-resolution photos will have more detail.
But the more megapixels a camera has, the more expensive it will be.
Professional photographers often use high-end Canon and Nikon DSLRs to shoot their product photos.
One thing to remember when selecting a camera is that megapixels are not the only consideration. Frames per second is also important.
Faster burst shooting sequences are common in sports photography.
For capturing fast action, you may want a camera with a higher megapixel count.
While a higher megapixel count is better, it usually comes with a higher cost.
While a high-megapixel camera is a must-have for product photographers, it’s important to remember that a higher pixel count will produce larger files and better print quality.
Higher resolution allows for finer editing and more detail, allowing you to crop your images more tightly, or print them large.
Also, higher megapixels are essential for professional photographers.
If you’re starting out in product photography, you can save up on the camera and instead invest in better lenses.
If you’re a professional photographer, you’re probably already aware of the advantages of DSLR cameras over compacts.
They come with more power and quality, but they are not cheap, and are largely reserved for professionals.
Which camera is best for product photography? The answer depends on your budget, skill, and intended use.
You can start by researching the advantages of each camera’s megapixel count.
A DSLR camera has more pixels and is generally better for taking photographs of objects and products.
However, its high resolution limits its size, which may be a hindrance for some photographers.
A standard DPI for printing is 300, and you can convert this number to pixels for a better understanding.
However, if you want to use the images to sell online, a DSLR is the best option.
You can choose a model that best suits your needs.
The main advantage of DSLRs for product photography is the level of manual control they offer.
With manual control over shutter speed and aperture, you can tailor the camera to suit your specific situation.
Another major advantage of a DSLR is that it costs between $500 and $700.
It can also be easily converted into a compact if you don’t have a lot of money to spend.
A digital camera, on the other hand, has no such limitations, making it an excellent choice for those who aren’t interested in using a DSLR for product photography.
One of the first questions you’ll be asked by a product photography company is “What camera resolution should I use?
Or which is the best camera for the product photography in 2026″
The answer depends on your needs, but generally you should aim for at least 40MP.
For commercial photography projects, you’ll need a higher resolution, while for smaller, personal jobs, a 12MP camera will do the job nicely.
Entry-level cameras come with 24MP sensors, but if you’re shooting for social media or web content, a lower resolution camera will suffice.
If you’re considering using a Sony A6100 for product photography, you need to be familiar with the camera’s capabilities.
First, you should learn about the products you’ll be photographing, which will help you capture the best images possible.
The Sony A6100 has many features that make it ideal for product photography.
The camera reads the light and sets the exposure according to its internal algorithms.
The Sony A6100 also considers whether the subject is in the center or spot, and compensates for black objects.
The A6100 has a 1.4-inch, high-resolution, tilting touchscreen. Both cameras also come with a battery.
If you’re just starting out, the Sony A6100 is an excellent choice or best camera for the jewelry photography.
Its 24-megapixel sensor gives you excellent quality for ecommerce product photography.
If you’re just starting out, the Sony A6100 is an excellent choice.
it’s also one of the most affordable, high-quality cameras currently on the market..
The A6100 has a 1.4-inch, high-resolution, tilting touchscreen. Both cameras also come with a battery.
The A6100’s battery life is good, but it can be a little more limiting for product photography.
A more portable option is the Sony A6600, which costs PS1450 and comes with two new APS-C lenses.
The A6600 also has a removable battery for taking photos.
The X-S10 is a powerful, portable camera with an advanced feature set that will be helpful for product photography.
If you’re in the business of product photography, you may want to consider the Fujifilm X-S10 for its high-speed performance and compact size.
The camera’s 179 autofocus points deliver fast, accurate focusing.
It also has a tilting LCD screen for composing and cropping high-resolution shots.

It boasts renowned design, engineering, and color science.
It has an ergonomic grip and a large, tilting LCD screen.
The camera’s autofocus speed is fast, at 0.02 seconds, and accurate down to -6EV.
It is also fully compatible with the latest crop sensors and software.
The Fujifilm X-S10’s zooming features allow you to shoot products up close or from long distances without compromising resolution.
This feature makes it easier to crop product‘s photos and enhance their clarity.
Moreover, it features in-body stabilization, which helps to avoid digital noise and maintain sharpness.
Its CMOS 4 sensor means that your photos will be incredibly detailed and will make excellent product images for eCommerce.
Product photography requires high-detail, proper exposure, and good lighting conditions.
Fujifilm’s X-S10 is one of the best cameras for this type of work.
However, before you buy a camera, make sure you consider the budget you have and your needs.
You may also want to consider hiring an image editing service to enhance your photos.
Choosing the best camera for your needs is critical to the success of your online business, and the Nikon D3500 is one of the best entry-level cameras for product photography.
Nikon D3500 is great for beginners and pros alike, thanks to its intuitive controls and fast hybrid autofocus.
Nikon D3500 is consider a best camera for fashion photography.
Its fast hybrid AF feature enables fast capturing, even when shooting fast-moving objects, such as a product or an e-commerce website.
With this camera, you can easily achieve the water splash effect, which is especially useful for product photography.
If you want to take beautiful images of products, you need to choose the right lens for your camera.
Lenses have several different characteristics, such as aperture, build quality, and focal length.
Another consideration when choosing the right lens is whether the camera uses a cropped or full-frame sensor.
Here are some of the most common types of lenses used for product photography.

The focal length of a lens is crucial when shooting products.
In general, the ideal focal length is from 80mm to 200mm.
This will help the photos have a compressed look while avoiding wide-angle distortion.
For product photography, a 50mm-plus lens is ideal, but a wider angle lens can provide an interesting look.
A lens’s maximum aperture (f-number) is also a crucial consideration.
A high-f-number means that the lens will allow more light to enter the camera sensor.
However, a low-f-number lens is often recommended for this type of photography.
A good macro lens is useful for photographing close-up details of products.
Whether you’re shooting a watch or an insect, macro lenses allow you to focus on even the smallest detail and produce sharp images.
These lenses are also ideal for tight-cropped compositions because they require less post-production work.
But remember that macro lenses aren’t suitable for everyday use.
Make sure you research the best lens for product photography needs before buying one.
When shooting products, the focal length of your lens is an important consideration.
This will determine how your subject is framed in the picture.
For instance, if you are shooting a product from above, a 50mm lens is better than a 300mm lens because it produces a shallow depth of field.
The final framing, however, will depend on the type of product you are photographing.
Generally, you want your subject to be in sharp focus throughout the shot.
While it isn’t the ideal focal length for product photography, it’s a good lens for a beginner.
It produces a sharp image when stopped down to f/8 and is sharpest wide open.
Some of its negative characteristics include chromatic aberration, which you can easily overcome with post-processing.
If you’re just starting out, however, a 50mm f/1.8 lens is a good choice.
To determine which lens is right for your product photography, move your subject around a few times.
Take notes on any changes in perspective.
Make preliminary conclusions about your product’s features.
Then, make a few rough test shots and see how they come out.
This will give you a good idea of what focal length to use.
Once you’ve done that, you’ll know which lens to buy based on your product and the environment.
Nikon has a wide-angle lens known as the NIKKOR Z series.
Its 85mm f1.8 USM lens is also a great choice for product photography.
Its variable focal length allows you to capture the largest object, yet still retain sharp details.
You can use the same lens for a wide angle shot, or buy a zoom lens for even wider-angle shots.
The zoom range is also important to get the best results.
You may be asking, “Do I need a macro lens for product photography?”
After all, capturing products at a macro distance means that you will need a macro lens.
These lenses are used for taking close-up photographs of small objects
They are often needed for professional product photography.
A macro lens is basically a magnifying glass, and it can be useful for a variety of situations.
Generally, macro lenses are used to photograph objects that are so small that they cannot be seen with the naked eye.
Using them, you can capture microscopic details, such as those found on microchips, multifaceted diamond rings, and jewelry.
They can also be used for other, more complex products.
However, macro lenses are not necessary for every type of product photography.
You may not need one for every product, but if you plan to shoot a lot of small items.
A macro lens will help you achieve excellent results.
In general, macro lenses are the most affordable lenses for product photography, but they’re not required for every scenario.
If you’re shooting products for your own personal use, then a standard lens will do just fine.
You can also opt for a third-party lens, such as the Tamron 35-150mm F/2.8-4 Di VC OSD.
However, some companies have trouble using tripods for product photography and are not willing to spend the money on a tripod.
As you can see, there are many different types of lenses for product photography, so choosing the right one is important.
Here are some of the best ones for product photographers in 2026.
These lenses are great for a variety of situations, and are designed for capturing products and details in the most natural light.
Some of these lenses are prime lenses, while others are zoom lenses.
If you’re interested in shooting products for e-commerce, you can use one of these lenses, especially if you don’t need the best quality.
We’ll go over some of them, as well as why they’re the best for product photography.
Read on for more information. We hope these lenses will serve your needs for years to come.
If you’re looking for a lens for product photography, you should consider the Canon EF 100mm F/2.8LIS USM.
The lens’ image stabilization makes it worth the extra money, delivering tripod-equivalent sharpness when hand-held.
However, the lens is less flexible than some competitors’ lenses, making it difficult to use with large-scale subjects.
The Canon EF 100mm F/2.8L Macro Lens is designed to accept the optional Canon Tripod Ring D, which is not available at the time of this review.
The lens’ focusing distance can be easily viewed using the distance scale, which is useful for macro photography.
Another feature of the lens is its Hybrid Image Stabilization (IS) system.
Aperture f/1.8 lets you take an amazing image of the products.
Even with the darkness prevailing throughout the aperture, it still maintains beautiful light-capturing quality in the truest form.
The outstanding RF 50mm f/1.8 is able to perform at the highest level of quality.
Producing stunning photos of the products, and with a maximum focal length of 50 millimeters, its lens can take product photography to the peak of beauty.
Moreover, The lens’s noise-free design lets the photographer of the product be close to the item to get a better view of the product’s beauty.
Each and every element of the product can be exposed to the user in order for them to observe the beauty.
The incredible image quality is not possible to achieve for a reasonable price, as it is with the EF 50mm f/1.8 STM that has now made it possible today.
The revolution in photography for products was a wish in the past but is now a reality.
The credit is due to the lens EF50mm f/1.8 STM.
Because of its outstanding features, experts rank it as one of the best lenses for product photography.
If you’re looking to get the best possible product photography shots, the Nikon 85mm f/1.8G AV NIKKOR Lens is the lens for you.
The lightweight, compact design and manual focus control will allow you to create some unique shots.
Specifically designed for Nikon’s FX-format cameras, the NIKKOR lens is a great choice for product photography because of its versatility and low cost.
This low-cost lens will provide sharp images, decent close-focusing capabilities, and nice background bokeh.
Its f/1.8 maximum aperture is ideal for taking beautiful product pictures in low light.
Its fast focusing speed makes it perfect for product photographers.
It’s also one of the most popular lenses among digital photographers.
Its f/1.8 aperture lets you capture products in almost any light conditions.
The AF-S NIKKOR 85mm f/1.8G lens is a fast and compact prime medium telephoto lens optimized for Nikon FX-format DSLRs.
Its f/1.8 maximum aperture makes it perfect for shooting in low light, and the wide-open effect is great for available-light photographers.
When mounted on a DX-format DSLR, this lens offers an apparent focal length of 127mm.
The AF-S NIKKOR 85mm v-S lens offers a wide angle of view, which gives you a unique perspective on the product.
Its f/1.8 maximum aperture and M/A focusing system help you achieve sharp, colorful images, even in low light conditions.
The 127mm field of view helps you take the perfect product picture.
When choosing a background for your product photography, there are a few things to keep in mind.
While many ecommerce platforms specify a specific color or background type, some may be ambiguous.
A neutral color such as white is often a safe bet.
However, you can add artistic designs and filters during post-production.
During the shoot, you should consider the best image sizes for the images you plan to use on social media.
Using a white background in product photos will make it easy to crop the images for online stores and social media.
The color of your product and brand is also an important consideration.
Colors should complement your brand’s overall image and help customers identify the products.
Contrasting colors can help a product stand out without taking the viewer’s attention away from it.
In addition, contrasting colors will help make your product stand out from the background and complement the placement of your product.
When choosing a background, remember that it’s important to keep the overall look and feel cohesive with the rest of your brand’s images.
Product photography backgrounds play a vital role in the overall impact of your images.
A busy, cluttered background is likely to divert attention away from your product, which is the main purpose of your images.
Remember that a background can enhance or detract from a product, so choose yours carefully.
You want to convey as much of the product as possible, and a busy background will only serve to distract from it.
The perfect backdrop can be painted in a variety of colors to fit your product.
The options are nearly limitless.
Most product photography backdrops. are white, but there are many different colors to choose from.
Black, for example, is a classic color that can look classy in any situation.
If you’re not sure which color to choose, white is the most universally flattering.
This color is not only neutral and helps your product look professional, but it’s also the most popular.
But if you want to experiment with different colors, stick with light shades.
Avoid patterns as they can detract from your product.
Make sure that your product is the main focus of the photo and not the background.
While white is a common choice for the background of online marketplaces, a gray background is also a popular option.
Gray backgrounds are neutral and help highlight the product, and are perfect for 3D mannequin product shots.
The darkest option is black, and works well for some products.
You may want to experiment with a variety of shades to find the perfect background for your products.
When you are choosing your background color, you should also consider the composition of your product.
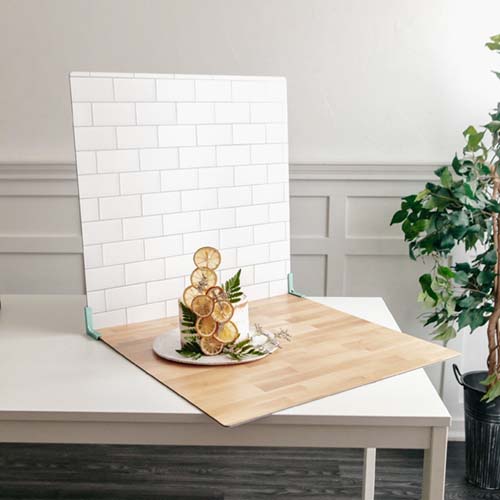
Easy DIY photo shoot backdrop.
Just make sure that you have access to the largest piece of plywood board possible.
Use tester pots of paint to make sure that the finished product will match the mood of the photo.
Also, remember to use 10mm plywood for this project.
Don’t worry if your backdrop isn’t perfect – you can always retouch it in Photoshop.
Fog machines are easy to find, easy to transport, and create an ethereal and rustic effect.
If you’re shooting a product or still-life subject, you can also make use of an old truck for your photo shoot.
These trucks are great for still-life subjects and can be used in a wide variety of scenarios.
If you’re not comfortable with setting up a fog machine in your own space, you can always rent one.
When choosing a DIY backdrop, consider how much time you’ll spend assembling or dismantling it.
But if you don’t feel comfortable doing it, you can always hire someone to make it for you.
You should also take into consideration the composition of the image and where your subjects are standing.
You should also consider whether the backdrop will cover the entire floor, if any.
One of the most affordable ways to create a DIY photo backdrop is to cut a circle out of black construction paper.
You can cut it into any shape, such as a heart, which is easy to cut freehand.
If you’re not confident with your skills.
You can purchase shaped hole punches to create perfect circles and other shapes.
Once you’ve chosen the right size, make sure that it won’t overlap the lens.
If you’re looking for unique product photography backdrops, you’ve come to the right place!
Here are some tips for shooting your products against an interesting background.
You can experiment with different colors and textures before shooting on a more permanent background.
Then, you can use those ideas to refine your product shots!
You can learn more about the art of backdrop-making in Photoshop.
One of the tried-and-tested ideas for product photography backdrops is a splash of liquid!
Taking a photograph with a liquid splash is easy to do.
A quarter-hour shutter speed works great!
While many people use cellophane wrap to create a stunning product photography backdrop.
you must be sure that you’re able to control the amount of visible flash reflection.
If you need a background for your product photography shoot.
you might want to consider buying a vinyl backdrop.
Vinyl backdrops come in a variety of colors and are waterproof and tear-proof.
You can also use them as an outdoor topper or a scenic backdrop.
They can be rolled up and placed on a floor or wall.
And since they are so durable, they won’t need much maintenance.

If you’re looking to get the best bang for your buck, then a vinyl backdrop is a great choice.
You can find both plain and multi-textured backdrops.
Some of them come in rolls, so make sure to flatten them out before sticking them on the background.
While vinyl rolls up well, make sure you unroll it before sticking it on the wood.
Moreover, be sure to use a flat, dust-free surface.
You can even choose to use a wooden backdrop if it’s easier for you to set up the studio.
you can use the Vinyl Backdrops as a gold jewelry background photography.
Whether you are doing an ad campaign or a portfolio.
A wooden background will work for your product photography.
This is a popular choice because it is easily customizable and comes in a variety of colors and styles.
The backdrop does not have to match your products.
But it should complement the overall look and feel of the product.
In addition, it is inexpensive and easily disposable, so you can use it over again without spending a fortune.
A wooden background can be a great choice if you want to evoke rustic vibes and show off a realistic effect.
A wooden background can be a great choice if you want to evoke rustic vibes and show off a realistic effect.
Besides, woods are available everywhere and lend themselves to a beautiful visual aesthetic.
While a wooden workbench or countertop may look great to you.
The customers might not feel that way about the product.

A wood-colored background can also give the product a more realistic look.
Wooden backdrops are a great choice for product photography because they’re easy to use and store.
One of the most important aspects of a photo is its background.
A busy background will detract attention from the product.
It’s better to choose a wood-like or textured background than a busy one with many elements.
Remember, most people are looking for a product and not a background that’s too busy to be interesting or attention-grabbing.
You can create an interesting background that will keep the viewers interested and engaged.
Before you take a photo of your product, you need to choose the right background.
If you want to show off a particular flower, you can choose one with a dark background.
A strobe, shot box, or steady light source can be used for this.
The flower should be at least two stops brighter than the background, and the light source should be set several feet away.
You can use a photo-shopping website to find the best floral backdrop for your products.
The background can be made of wrapping paper or aluminum foil.

It is important to set the object at a distance of six feet or more from the background.
You can also use a flash in combination with the natural light.
Be sure to set the flash at an angle that complements the flower.
The black background will also allow you to use a higher F-stop on your camera, resulting in a slower shutter speed and improved depth of field.
This effect is particularly useful when photographing dangle earrings.
Photographing flowers is not an easy task. They need a clean, bare background.
If you choose to use natural light, it is best to choose a sunny day.
Otherwise, it is best to choose a background with neutral colors.
If you don’t want to use artificial light, try to use window light instead.
Artificial light will produce an orange tint.
In addition, make sure to choose the background carefully.
A busy background can distract from your subject.
When taking photographs of products, it’s important to choose the right type of tripod.
This type of tripod allows for precise positioning and accurate lighting.
These tripods typically feature four adjustable legs and can be folded for easy storage.
They also come with mounting screws and adapters.
The tripod is a very versatile piece of photography equipment.
They are ideal for photographing products because they provide stability, clarity, and balance.
You don’t want your photos to look out of focus or blurry, and customers will notice.
A tripod will also free up your hands so that you can focus on composition and check the camera’s settings more easily.
This will allow you to take more pictures in less time!
The best tripods for product photography combine usability, affordability, and quality.
These tripods are a great investment.
These models combine high-quality construction and reasonable prices.
Choosing a tripod is an essential step in starting a career in product photography.
However, if you are unsure about what type of tripod you need, start by taking a look at the reviews of different brands and models of the same type.
This way, you’ll know what to look for before you purchase a product photography tripod.
If you plan to use a tripod for your product photography.
You need to choose one that is stable and can hold the weight of the camera.
If you’re not a professional photographer, then a cheap tripod will work just as well.
Look for tripods with an adjustable central column.
These can help you get a bird’s-eye view of your product.
There are a lot of different kinds of tripods on the market.
One of the most important things to consider when buying a tripod is the height.
Depending on the height of your source of light.
You’ll either need a mini tripod or a full-size tripod.
You can also purchase separate tripod heads, which give you more flexibility and more functionality.
But you’ll need to pay a little more for a separate tripod head.
You’ll want to make sure that the tripod you choose is strong enough to hold your camera.
Sharpness: Taking a sharp picture is essential.
A low-aperture lens will give you a shallow depth of field and require you to use a slow shutter speed to capture the image.
This is impossible to do with your hands, so a tripod will prevent blurry images.
And if you plan to take lots of images of one product.
A tripod is an essential tool for your photography.
The tripod you choose will depend on your budget and the type of product you are photographing.
A more expensive tripod will be more stable but will also weigh more.
For the sake of simplicity, I will recommend a lightweight tripod.
However, a heavy-duty tripod will cost more than a thousand dollars.
These tripods can also hold heavier cameras and laptop mounts.
For product photography, positioning heads are essential.
And you can get a Manfrotto tripod with a couple of included accessories.
The Zomei M5 camera tripod is a popular choice.
It has four legs and a ball head.
Its leg extensions can extend to 76 inches.
The Zomei M5 is one of the most popular tripods on Amazon, and has a lot of great features.
However, before you make your purchase, it is important to read the product reviews first.
If you’re thinking about investing in a new tripod for your product photography.
Consider the Manfrotto MT055CxPRO3.
This tripod has many features, including a central column that can be swung horizontally.
Just like a boom, and legs that can be adjusted to a squatted or horizontal position for great macro photography.
Besides being lightweight, the Manfrotto MT055CxPRO3 is also tough, weighing only 2.5 kilograms and extending to 72 inches.
It also has Quick Power Locks that improve its rigidity by 50 percent.
It’s also made of carbon fiber, and is sturdy enough for the most demanding photography needs.
Its price is also competitive, so it’s a good deal.
If you’re planning to shoot a lot of macro shots.
The Manfrotto MT055CxPRO3 is the perfect tripod for you.
With its carbon fiber legs and enlarged leg tabs.
This tripod has excellent stability for your macro work.
And with a total load carrying capacity of 12 kilos, it’s one of the best products on the market.
The Vanguard Alta Pro 263AP is an excellent tripod for close-up product photography.
Its lightweight aluminum alloy legs offer three different angles for a variety of shots.
The tripod’s height can be adjusted to a maximum of 175cm.
The tilting pan head provides a smooth, even motion.
The tripod’s Swivel Stop-n-Lock System enables you to change its height as necessary.
The Vanguard Alta Pro 263AP Aluminum Tripod is a full-sized, aluminum tripod with 11 lb of load capacity.
The tripod is easy to carry, measuring less than 27 inches when folded.
It extends to 54.5 inches when fully extended.
The central column is extendible for an extra 13 inches of height.
Its three-way pan head allows you to achieve the perfect composition in a variety of shooting conditions.
The Zomei M5 tripod for product Photography is an excellent choice for multiple purposes, and is lightweight and compact.
Unlike other tripods, this one collapses into a small size that fits in a medium-size camera bag.
Lastly, it is a very affordable option.
The only disadvantage is that it has a height limit and no horizontal bar.
A combination of one or two high-quality continuous lights is the best lighting kit for product photography.
The lights stay on while you style the products.
The lights can either be high-power LEDs, tungsten light bulbs, or low-pressure mercury vapor gas-displacement fluorescent lamps.
If you’re on a budget, you can get by with just one continuous light and a white foam board.
A few low-cost lighting kits will also work fine, but are not as powerful as high-quality studio lights.
When choosing a lighting kit, remember that you can use natural light as well as artificial light to achieve the desired effect.
The best kit will have a diffuser that will make the light softer than a hard-edged flash.
There are two basic styles of product photography: white and bright and dark and moody.
The white and bright style is ideal for a wide variety of products, including home and wellness products.
To create a white and bright look, you can use one light, a white/black foam board, and a bright-colored backdrop.
Another option is to buy a lighting kit specifically designed for product photography.
It is a good idea to invest in one that has a wide variety of accessories to make sure you get the best results possible.
Lighting kits can help you get the best photos possible by removing shadows and reflections.
They’re great for portraits, but also make your product photos look more professional.
With the proper lighting, you’ll be able to turn the lookers into buyers!
Among all the color temperatures, 5000K is the perfect white natural daylight for product photography.
Lower Kelvin values will result in overexposure, whereas higher values will produce a more natural look.
Professional photographers, however, should not worry about this.
Because the 5000K temperature won’t interfere with editing software and will help achieve a natural color balance.
For product photography, this light temperature is the most important.
While you’re doing product photography yourself, you can use household lamps for lighting.
When looking for a DIY product photography lighting kit.
Daylight high wattage bulbs are your best bet.
They will give you the best white balance, but reading-lamp bulbs will not do the job.
The brightest white-balanced bulbs will also give you softer shadows and allow you to use a narrower aperture.
Once you’ve set up your lighting system, it’s time to study your test photos.
Run a series of test photos, and study them on your computer monitor.
Fix problem areas if you find them.
Problem areas are usually in the shadows and reflections.
These will detract from the clarity of the product.
In addition to a good photo, it will also increase your sales.
If you are just starting out, don’t forget to practice on your products.
Color profile is another important factor to consider.
If you’re shooting your product online, you’ll want to make sure the image is sharp.
This means a low aperture and slow shutter speed.
These settings aren’t ideal for handheld product photography.
Make sure you use a tripod to avoid blurring your images.
You can find a free tutorial on Adobe Photoshop.
Keep in mind that these color choices are representative of the product, so make sure you use the right one for it.
If you’re a beginner in the world of product photography, you should consider purchasing the Emart 10-inch Ring Light with an Adjustable Tripod.
It’s an inexpensive option that is capable of producing beautiful results.
This light is perfect for portraits and product photography.
It contains 352 high-CRI LED light beads, with variable color temperatures and dimming options.
It can be adjusted up to 360 degrees.
Its remote lets you control the light remotely and you can even place color filters on your products.
A ring light is an excellent tool for photographers of products because it can expose all of a product without casting shadows on its background.
A ring light’s ring can also be used to shoot close-ups of products and body parts, such as eyes, hands, or other details.
A ring light also helps you create a more appealing and eye-catching product image.
You can find a ring light at most photography stores.
It is difficult to determine which lighting technique to use for your product shots – whether you want natural light or artificial.
Regardless of your shooting technique, good lighting will make a big difference in your finished image.
The best method is to shoot near a window on a bright day – a window provides the most natural lighting, and the best way to use it is to shoot next to a window!
However, direct sunlight may not be the most appropriate lighting for your product – it can cast too harsh a shadow on the product and make it look too dark.
To get good lighting for product photographs, you should use fluorescent and LED bulbs.
These types of lights produce minimal heat, which means you don’t have to worry about burning your hands or becoming sweltering!
You can also try using LED flashlights.
The brighter the LED flashlight, the better – but don’t buy a cheap one – because it will only frustrate you!
You can use powerful flashlights to direct the light onto specific areas of the product, such as the edges and corners.
The next step in taking good product photographs is to select the right background.
A plain wall can make a good background.
But it is best to use a baseball field if you’re selling a baseball glove!
Natural lighting is the best kind for product photographs.
And it can be as subtle as a sky or a window.
Natural light at midday is harsh, so choose an outdoor location when possible, or pose in front of a window if you can.
There are a variety of lighting kits on the market.
The type of lighting you need depends on the type of photography you are doing.
Portraits are one type of photography, and products are another.
Besides, there are also green screen videos, which allow you to be more creative with the background of your videos.
Here are some of the most popular lighting kits.
The Neewer Photography Studio Lighting Kit comes with everything you need to shoot great product photos.
The kit includes 4 light stands, 2 light holders, 4 Daylight bulbs, a backdrop frame, 3 softboxes, and 2 carry bags.
The kit is designed for product photography and would impress any Annie Leibovitz.
But if you’re a beginner and don’t know where to start, there are other options.
The lighting kit includes several accessories.
It has 4 light stands, two white umbrellas, two softboxes, and four 45W CFL daylight bulbs.
It also includes six backdrop clamps and one backdrop support system.
Each stand is adjustable for the ideal angle and light source placement.
The light stands are sturdy and lightweight, allowing for easy transportation.
The LED lighting kit is suitable for both indoor and outdoor use.
The Neewer Photography Studio Lighting Kit for the Product Photography has many features and benefits.
Its durable construction and detailed instructions will make it a perfect choice for indoor shooting.
The softboxes, diffusers, and stand-mounted light sources will give you the desired amount of light, which will enhance the quality of your shots.
Its adjustable stands will give you the flexibility to shoot from any angle.
The Neewer Photography Studio Lighting Kit is a universal, cost-effective, and easy-to-use product photography lighting kit.
Its low price and ease of use make it ideal for beginners and experienced photographers alike.
The kit comes with the necessary components and instructions, as well as a sturdy carry bag.
For more complex lighting situations, you can also purchase additional lighting kits.
This lighting kit also features a backdrop that can be used for your product photography.
If you’re into taking high-quality photos, you may want to consider purchasing a LimoStudio Photography Studio Lighting Kit.
Whether you want to capture a stunning wedding or product photo.
A lighting kit can provide the perfect lighting conditions for your project.
Here’s what you need to know about this lighting kit.
The following are some of the main benefits of buying a lighting kit.
A light stand should be adjustable for the desired angle.
A stand with a ‘green screen’ design is ideal if you’re going to edit background images into your photographs.
Make sure that the stand includes a support system to keep it in place.
Many kits come with backdrops.
One of the main benefits of a studio lighting kit is that it’s universal.
Most of these kits are designed to work with both professional and amateur photographers.
Each kit has all the necessary components and comes with a user manual.
The kit comes with an adjustable light stand and sturdy carrying case.
With these benefits, you’ll be on your way to a successful product photography.
If you’re new to product photography, it’s a good idea to purchase a studio lighting kit to get started.
However, keep in mind that the lighting kit will cost you more than the components would if you had to buy them individually.
A lighting kit that includes two light holders with soft box reflectors is crucial for the successful product photo shoot.
Softbox reflectors, made of high-quality nylon, eliminate shadows while the light stands hold up the umbrellas on sturdy legs.
A light stand with adjustable legs is essential to get the best light from the softbox reflectors.
Those stands are easily adjustable and can be placed anywhere on the light stand.
The included light bulbs are energy-saving spiral lights that help you save up to 80% of your electricity bill.
The Emart Photography Studio Lighting Kit for the product photographs is a versatile tool for capturing high-quality images.
These two-light stands can be adjusted up to eighty inches tall.
Both include a tripod, which can adjust from thirty to eighty three inches.
Two umbrellas that are 33 inches in diameter.
The umbrellas come with diffuser covers and are made of high-quality nylon.
The Emart Photography Studio Lighting Kit for the product photos includes two softboxes that measure twenty-eight inches in diameter.
The two-light stands have screw mounting on the top and a reliable locking system.
The kit is highly portable and is suitable for indoor and outdoor product photography.
The Emart Photography Studio Lighting Kit comes with three light stands
One with a maximum height of eighty-three inches and a three-light stand measuring thirty-three inches tall.
The stands are compatible with many reflectors.
They have 3-legged stages for stability and versatility.
The kit also comes with two high-quality nylon carrying cases.
Another great lighting kit is the Emart 600W Continuous Lighting Kit.
This kit is perfect for product photography.
It is perfect for beginners, especially if you are just starting out.
A box light is a common piece of photography equipment.
That allows you to take photos of specific objects.
The main function of this type of lighting is to help you get the perfect shot.
A light box can be set up in a variety of ways.
The type of box you use depends on the object you are trying to capture.
Some people use a flash to enhance the lighting of a subject.
Others use a box light for ambient light.
For the best results, you should use a light source that is different from the one used for ambient lighting.
Box lights usually use two 100-watt daylight bulbs.
which mimic the color of sunlight and cut the need for post-processing.
Other light sources include flashes and halogen work lights.
But these can get quite hot and pose a fire hazard.
Whether you use a flash or a box light depends on your goals and what you want to photograph.
Lighting in a room is often the most difficult aspect of taking pictures.
Room lighting is often uneven and causes problems with your white balance.
Likewise, not enough light can result in an underexposed shot.
You can buy an online light box.
If you are on a budget, you can also make one yourself.
A light box can help you capture a perfect photo of a subject without a flash.
A photo light box can improve the quality of your images.
But it cannot compensate for improper lighting.
Proper lighting can enhance your images by suppressing shadows and improving texture.
Whether you are taking a portrait or a landscape.
You should always consider proper lighting techniques.
This article will discuss what to look for in a light box.
It is an important question that you must think about before investing in one.
To get the most out of your photo light box, you should choose a model to fit your needs.
Most models come with many lights.
A light stand, and fabric backgrounds in various colors.
You can choose from these options depending on your needs and budget.
Make sure that the object you plan to photograph fits in the light box to look great when it is photographed.
Once you have chosen a light box, you should find a location.
In your home that will accommodate the lighting.
There are two main types of photography light boxes.
These types of boxes are compatible with various kinds of cameras.
They are portable and fold down to save space.
They can also be stored in small gaps.
Most light boxes can be purchased at a discount price from online retailers.
If you’re interested in purchasing one, read this review.
If you plan to use the photo light box for a specific purpose, you’ll want to consider the size, shape, and material.
Depending on your artwork’s size, you may want a larger light box with more than one side.
This option is especially useful if you are sketching a large piece.
This number ranges from 1,000 to 10,000 Kelvin and should be in the range of 5000K to 6000K.
You can also use a USB battery bank to charge the light box.
This option is great if you work with many artworks, such as a poster.
It also has an AC power source that can be removed and replaced.
Depending on the photography, you may want a larger light box with more than one side.
This option is especially useful if you are sketching a large piece.
You can also use a USB battery bank to charge the light box.
This option is great if you work with many artworks, such as a poster.
It also has an AC power source that can be removed and replaced.
A light box can also be used for a photo shoot.
These boxes are generally set up on a flat surface.
Place the light sources on either side of the box.
Place the camera or tripod in the center of the box.
You’ll want to attach a backdrop on the top of the light box.
Make sure it’s clean and not dusty, or it will prevent you from seeing the subject.
The Neewer 24-x-24 Light Cube for photography has many benefits.
It’s portable, and the 16” cube is large enough to capture small and medium-sized items.
It’s made of 84 LED light strips.
So you can position them to achieve the right amount of light around your subjects.
It also has many positions to use indoors or outdoors, and it is color-corrected for daylight at 5000K.
This light box includes a white background.
Four different colored backgrounds, and a carrying case.
You’ll need some lights for it, but the box comes with a Micro USB cable.
You can connect this to a laptop or power outlet.
It’s also made of hard polypropylene material, making it less likely to scratch.
The Neewer 24 x 24-inch Light Cube for photography comes with a free ebook and a tabletop kit.
It’s allowing you to take photographs without hiring a professional.
ORANGEMONKIE’s Foldio3 Fordable Photo Studio Box is designed to be portable yet versatile.
With its 25″ size and magnetic structure, it is be assembled in under 10 seconds.
With a telescoping handle, the box is easy to carry and set up.
It comes with a black backdrop to cut reflections and help you capture the best shot possible.
The ORANGEMONKIE Foldio 3 Foldable Photo Studio Box.
It has all the features you’ll need to capture your next great shot.
It’s lightweight, folds flat for easy storage.
It’s features a triple LED daylight light source with a per-installed diffuse cover.
It’s also perfect for taking shots of small to medium-sized objects.
The Foldio3 features 3 LED light strips and 2 halo light bars with dimming control.
ORANGEMONKIE Foldio3 attached to the box by magnets.
It is adjustable for a range of lighting effects.
The Foldio3 has an optional Halo Light system.
It can be purchased separately, but is less expensive as a package.
The Foldio3 also includes a Smart Turntable, making 360-degree animation possible.
A light tent is a great tool for taking product photos and is the perfect addition to any photo shoot.
It is a versatile light source that can illuminate your product or make it appear larger.
The tent comes with many openings and is very easy to set up.
A foam core floor can make it easier to transport.
Another important feature of a light tent is its portability.
One can pack it up and move it to the next location without hassles.
Another useful light tent kit is the Puluz mini photo studio box, which is convenient and easy to use.
It comes with a light tent kit and a white folding light softbox with 20 LED lights.
Also including six backdrops to display your products.
Both light tent kits are available at very affordable prices.
You can also buy a 24” tabletop photography studio with a light tent kit.
It comes with a 2x double headlight set, a mini camera stand, and a light tent.
It is also portable and foldable, perfect for on-the-go photography.
A 16×16 Light Tent Kit is another great option for product photography.
It is portable, can be set up indoors or outdoors, and includes six different backgrounds.
It is make of hard polypropylene, durable, and less likely to break. Moreover, it comes with a free eBook.
Including tips and tricks from professional photographers.
You can also use these light tents for video recording and online courses.
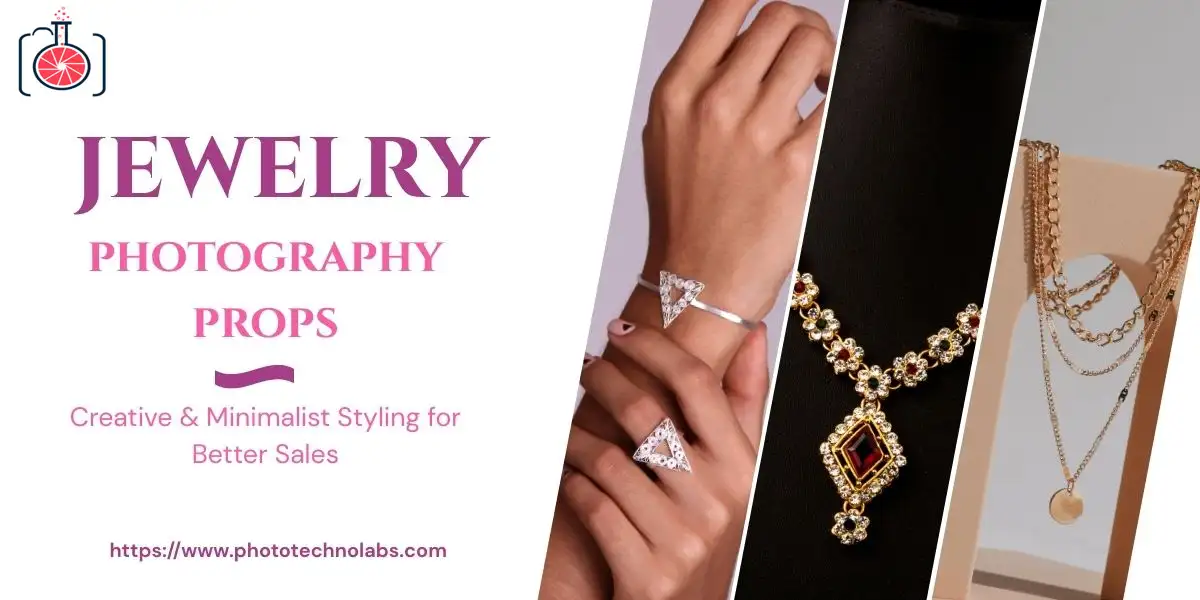
Product photographers often reach for a particular type of prop to complete their pictures.
Props help to create a scene and can add a narrative to the photo.
Yet, it is important not to overwhelm yourself with too many props.
Which can waste valuable space and money.
Instead, choose props that you can use in different scenarios, such as colorful balloons, books, or magazines.
Using a variety of props can help you save money and space and make your product photography more effective.
If you’re taking pictures of jewellery, a ring and a pendant can add a dazzling touch.
You can use the reflections in objects such as a mirror to create an artistic composition.
You can try using items found in nature as props.
They can provide a natural backdrop or even act as natural furniture.
But whatever you choose, make sure to keep the background simple so that the focus is on the product.
A good product photographer has a collection of props, but they can also use objects around them.
While it’s best to buy props, clients are often encouraged to bring their own.
If that’s not possible, a product photographer can use old doors or vintage furniture.
Stools, boxes, and vintage furniture are common props.
Props are an important part of product photography and should be used.
Props can be used to create an appealing image in product photos.
Props are an important part of a good photo but don’t go overboard.
While some props can enhance the effect of your photo.
Also too much use of a prop can take away from the focus of the product and confuse the viewer.
Try to take at least two versions of each photo before making your final decision.
There are many online websites to buy backdrops according to your needs and budget.
You can visit your near local store as well.
You can check on Amazon as well.
If you require white background, in that case, you can buy the thick white paper as well.
Incorporate props in your photography to add depth and interest.
You can buy props for product photography, food photography, and craft show displays.
Acrylic blocks help you adjust the angle and height of your props.
They also add the perfect finishing touch to your photography shoot.
Acrylic blocks come in many different shapes, sizes, and styles.
Here are some great examples of the best types of product photography.
Below are some helpful tips to help you decide which props to use in your product photography.
Choose props that match the theme and style of your product photo shoot.
For example, if you’re shooting a new recipe, don’t use food props with confusing labels or logos.
Instead, choose props that compliment the product and its background.
A tray can also be used for other purposes, including filling up space and laying things into.
It can also serve as a serving tray using food props.
The reflective quality of acrylic is ideal for beautiful flat lays and texture shots.
It also works well with jewelry and small products.
These versatile props are also great for preventing stains on your paper backdrop.
They can also be used to break up straight lines, which adds a more organic look to your shots.
For product photography, it’s best to buy clear, high-quality acrylic pieces.
You can even find free image editing software online to get started.
Geometric Foam can be used to make product photos stand out.
The props are available in various colors and sizes, so you can pick whatever works for your product.
A set of four designs can be purchased in different colors.
Or you can choose one of the packages with many props in one .
Before you start photographing your products, consider your target audience.
Are they men, women, children, or teens?
It will help you determine the best type of background and props for your product photography.
Remember that your audience isn’t always the end-user.
So you should keep this in mind when choosing props.
Choosing props is an important part of the product photography process.
So make sure they fit the aesthetic you’re aiming for.
A few unconventional shapes and colors can also work for your product photos.
Opt for a background that is off-center.
The best results will highlight the product rather than focus on its background.
Men’s skincare brand MANTL is a great example of how to play with shapes and colors.
The brand used props and color variations to make the bottles stand out.
These props and accessories make the photos more interesting and add depth to the shots.
In the digital age, the product photography is important for any beauty brand.
A well-shot image can capture the essence of a product and allow customers to imagine what they will get.
However, many beauty brands don’t use enough images to showcase their products.
Customers will be more likely to buy a beauty product if the image is appealing.
According to research, 60% of consumers need at least three images to decide whether to buy a product.
Lighting is another vital aspect of beauty product photography.
Natural lighting creates the right balance of shadows and highlights.
Hard shadows can distort the image and bounce off reflective surfaces on the packaging.
Try to take several pictures of the same product with different light sources.
Including a diffuser and a reflector, to get the best balance.
The resulting images should appear more consistent than a single image.
Listed below are some tips on beauty product photography.
Before taking the photo, clean the product to remove any traces of dust.
Then polish it with a dry microfiber cloth to avoid fingerprints on glassy cosmetics.
Wear a pair of white gloves to protect your hands and camera from getting contaminated with lipstick.
For background, you can use white paper or an acrylic backdrop.
If you’re shooting a tall product, use a tall object as a prop.
Avoid using too much post-processing.
There are many tips and tricks that you can follow to ensure your jewelry photography looks great on your online store.
Make sure that you shoot each product using Aperture Priority to get sharp images.
Try to use an aperture of f11 or f16. Smaller apertures will reduce bokeh and let you display all the fine details.
Also, use a white background to create a more consistent look.
Natural lighting is an excellent choice for taking product photos.
Use an indirect light source to avoid harsh shadows and reflections when possible.
For best results, use white paper or another color that will diffuse light.
Avoid using props or colored paper because it will change the color of the light.
But, if you are working with a limited budget, you can also hire an editor to enhance your photos.
The final image should be high in quality and reflect the unique style of your jewelry brand.
There are many tips and tricks for taking good product photos.
But you must optimize your photo shoots if you want your photos to sell.
Here are some of the best practices to improve your product photography during the holiday season.
Use in-context photos of your products.
Please place them in a textured background with other items or people in the photos.
It will give the viewer a better sense of the products’ context and tone.
Staging your product images can also help you convey a sense of the product’s quality and tone.
Change your perspective.
When taking a photograph of a product, try changing the perspective from above or below to give unique look.
Getting down on a person’s level is a great way to convey authenticity and make a photo appear more authentic.
A remote-controlled camera makes this task easy and allows your family to enjoy the moment.
Try creating a diptych from two photos for a more natural and engaging shot.
This way, you can use complementary colors, angles, and perspectives.
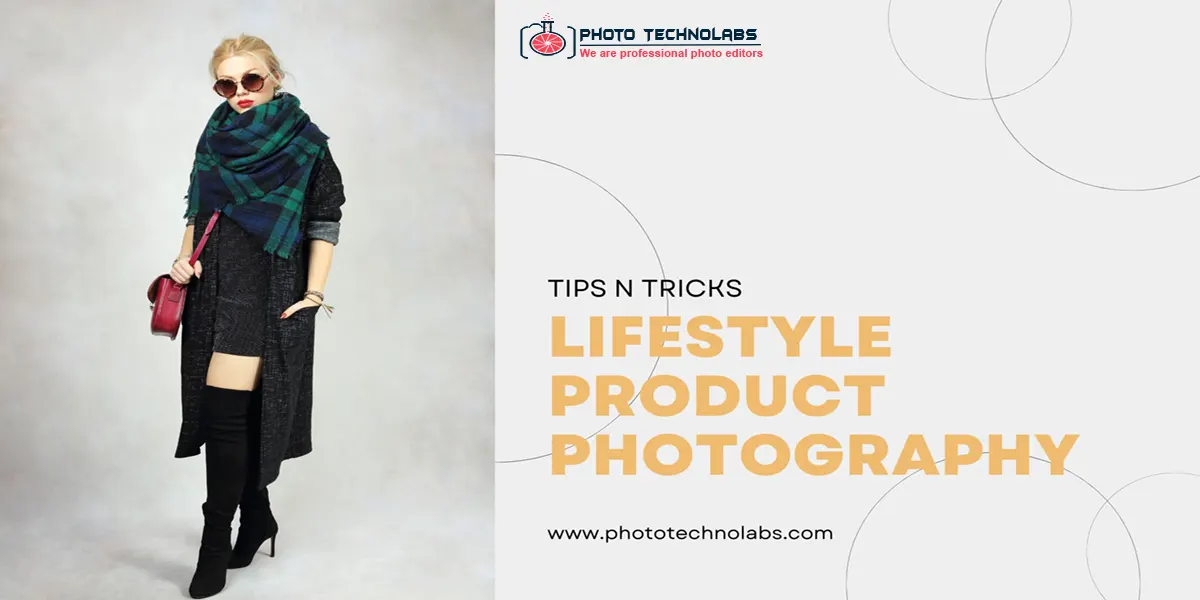
Taking a Lifestyle product photo is easy, but editing is different.
The products you photograph may look perfect on camera, but they won’t show up as well if you’re not adept at editing.
Here are some tips to improve your lifestyle product photography.
Avoid adding too many props, and make the product the star of the shot.
Using a color-correction tool is essential to avoid photos that look washed out or have too much blue or orange.
Before shooting your lifestyle product, you should determine your target audience.
Know your target audience’s age group, profession, interests, and education levels.
If you’re a makeup photographer, don’t shoot makeup on men or children.
Makeup photographers can’t shoot makeup on men and children, but if you’re a video gamer.
Consider the age group between 18 and 45.
For example, if you’re shooting a PS3.
Consider your audience’s interests when choosing your props.
When shooting your shoe products, it is vital to avoid any harsh lighting.
Which may degrade the image quality.
Natural light is best for taking shoe photography.
While artificial lighting should be soft and diffuse.
Another thing to keep in mind is the focus.
If you place the camera’s focus on the wrong side of the shoe.
The result will be visual tension, which will confuse your target audience.
Here are some tips for taking good shoe photos.
Props are also essential to enhance the photos.
Props can include flowers or even kittens.
However, don’t use too many accessories, as these may detract from the focus of the shoes.
Also, avoid blurred images. If you don’t know how to edit your photos, seek help from a photo shop expert.
If you feel overwhelmed by the process, don’t make drastic changes.
As these will affect your products.
You may be wondering how to take a good 360-degree product photo.
This trend has been growing in popularity in recent years.
Unlike traditional photography, 360-degree product photography allows the consumer to see a product in 360 degrees.
To take the best 360-degree photo, you should follow a few simple guidelines.
First, you should ensure the camera is on a tripod.
Second, use a zoom lens to get the best quality.
Third, use a remote to activate the 360-degree camera.
Another important aspect of 360-degree product photography is the ability to zoom in and out to show fine detail.
It is critical in an online viewing experience.
For example, the Canon 5D Mark IV can capture images with 30 megapixels.
The resolution allows the user to zoom in or out to see the serial number and change the color of their product.
Not only is it possible to create a 360-degree image with a few tools, but it is also not as costly as you might think.
If you want to make your product pictures more appealing, you may want to use photo editing services.
Photo editing is used to solve many common problems with product images.
It can give your products an even better look without affecting the original product photo.
This article will explain some of the most common ways to edit your product photos.
You can also learn how to edit a product photo yourself using free photo editing software.
However, if you are not comfortable with these tools.
You may want to consider hiring a professional product photography editing company.
The process of editing product images involves taking a photo and adjusting the colors.
The image must be readable and appealing for the online platform.
While it may seem easy, it takes time to retouch thousands of product images.
So, many companies turn to an eCommerce product photo editing service to take the strain off their hands.
It helps you achieve a uniform style and look for your images.
However, you must balance quality and price when choosing an eCommerce product photo editing service.
Your product photos are the best way to make a first impression when you launch an online shop.
A great product photo can be the difference between a successful online business and a failed one.
If your photo isn’t attractive, people will not buy your product.
High-quality product images attract more potential customers.
Most eCommerce shoppers will remember a product by its image rather than its name.
High-quality images also increase the credibility of a brand.
According to a recent study, 45% of consumers are more likely to buy an item if the image looks real.
Thus, product photo editing services can enhance the quality of your images.
It will also increase your website’s visibility.
Experts can enhance the natural entity of an image.
For instance, they can transform an unrealistic angle into an ideal one.
Moreover, they can hide the errors of the photographer.
With the right editing, you can raise your product’s sales.
A professionally-edited image will attract potential buyers and improve your sales.
A professional photo editor can make your product photos look like professional ones.
It will help you avoid common mistakes consumers make while purchasing a product.
One of the most obvious benefits of product photo editing is that you can reuse the images.
Using the same photo with an image retouching or manipulation service is possible.
One photo can be used for a product group, another product alone, or promotional offers.
Your company’s reputation will improve if your products look as good as possible.
If you’re selling products on an e-commerce platform, this will help you boost sales.
While most photographers are happy with the results they get from photo editing with Photoshop.
Not everyone is happy with the size of the resulting file.
While it’s tempting to save the largest file possible.
Photoshop’s high file size can hamper the sharing of your work.
There are ways to reduce the size of your photo without sacrificing its quality.
One of the easiest ways to improve the quality of a photograph is to crop it.
By removing distracting parts of the photograph, you can emphasize other details.
There are two basic tools available in Photoshop for this task. One of them is the clone stamp tool.
This tool allows you to set the sample area and works well with intricate edges and patterns.
Photoshop also provides options for adjusting the opacity of layers.
Aside from providing more ways to adjust color and exposure.
Photoshop also has features that make it easier for photographers to create artistic images.
For instance, with Photoshop, users can apply stylized edits and choose to favor a particular look.
There are many reasons to use Lightroom for photo editing.
The most obvious one is its flexibility.
You can apply the same editing settings to a variety of photos.
Lightroom comes with many presets, but you can also create your own by adjusting the tools.
Unlike other photo editing software, Lightroom also includes an interactive tutorial to help you learn the ropes.
Unlike Classic, Lightroom offers several tutorials and guides to help you create stunning photos in no time.
Depending on your needs, you can learn photo editing as little as a day.
You can also buy a lifetime license to Lightroom for a low price.
You can find out more information about Lightroom here.
If you are using Lightroom or Photoshop to edit your images so Photodirector365 is working same.
The Edit module opens with a workspace that resembles Photoshop’s.
The toolbar is similar, including the layers panel and blending modes.
Other features of PhotoDirector365 include distortion tools and text editing.
This program also offers a Guided module with many tools beyond Lightroom’s basic editing capabilities.
It offers bokeh and blur filters, as well as overlay textures.
A light rays effect is another feature available in the Guided module.
The Guided module also includes presets for different photo effects, such as the “ghost” effect.
There are many more features to choose from, including the ability to adjust font, kerning, and shadow.
Using PhotoDirector365, you can make beautiful images that will be treasured for years to come.
You can improve your photography skills by downloading the Photo Editing Apps on Android and iOS.
These applications come with various tools and features that make it easy to create the perfect photo.
Here is a brief review of some of the best photo editing apps for iPhone, iPad, and Android devices.
With so many great options, it is hard to choose the best.
Picnik is an excellent choice if you want to make simple edits on your images.
But it may not be enough for more advanced users.
While the app comes with a free version, it has an optional subscription for more tools.
It also has a story section and social feed. Where you can discover other photographers and gain inspiration.
However, it does must payment for texture packs.
Another great choice is Pixlr, which comes with a collage tool, and complete control of your image.
Photos Pos Pro is another excellent choice if you’re beginning to learn about editing photos.
This browser-based app offers two interfaces for beginners and one for experts.
Both have pros and cons, but PiZap is still a great option.
When it comes to editing photos, many mobile applications offer a variety of features, including photo editing.
Some are free, while others cost money.
Adobe Lightroom Mobile is one such app.
With tons of features, it’s easy to use, and it has the same great tools as its desktop counterpart.
You can import your RAW files and remove the red-eye, among other things.
In addition, the app features over a dozen filters and is free.
Lightroom Mobile is the perfect app for photographers.
Who don’t want to download the full program and are starting.
The app’s camera feature allows users to take photos in raw format on iPhones and Androids.
It allows for greater editing options and offers cloud storage.
It also lets you upload your images to social media and tell a story through them.
This app is free to download and has no posting limits.
The Photoshop Express app allows you to manipulate your images in a few different ways.
Besides to basic editing features, it includes Auto-enhancement, Filters, and cropping tools.
You can adjust the intensity of the selected filter or look to add a touch of creativity.
Cropping helps you improve the composition of your pictures.
In addition to editing the photo’s brightness, contrast, and saturation, you can also make it realistic using the Spot Heal tool.
The Overlays option offers you a range of options for editing your photos, including light leaks and textures.
These effects can add interest and artistic output. They are also useful for fixing small flaws.
Another Photoshop Express feature is the Spot Removal tool.
Spot removal helps you get rid of unwanted distractions from your images.
The app also has an Auto Settings option.
For iOS devices, the app includes 7 color filters that correspond to various subjects.
Whether you want to enhance your photos or make minor adjustments.
Photoshop Express has the tools you need.
While the program isn’t as comprehensive as the full Photoshop.
It offers a variety of editing tools.
The Light, Color, and Effects change tools can ruin your photos if used too.
The Blur and Details change tools can make your iPhone photos look more natural.
If you have a dark photo, the Highlights change tool can enhance the brightness.
If you’re looking for a free online photo editor, Pixlr Editor is a great option.
Its interface is like that of photoshop, and you can upload your photos from your device.
You can also import images from the web address.
It even comes with a mobile application that makes editing your photos convenient.
With more than 10 million designs and an advanced photo editing tool, you’re bound to find the best one to suit your needs.
Pixlr is available in both free and premium versions.
With the free version, you’ll get access to both Pixlr X and E.
Basic editing tools like cropping and resizing are included, as are overlays, stickers, and other options.
The free version comes with ads that compensate for the lack of paid options.
If you want to use the full power of Pixlr, you should subscribe to its premium plan.
Snapseed is one such app. It offers a range of tools and filters to enhance your photos.
You can adjust your photos’ contrast, brightness, and saturation with its tools.
Snapseed allows you to change the look of your photos by retouching them, removing or erasing .
The tools available in Snapseed are grouped into various categories.
You can access the settings to customize your editing.
Snapseed lets you add, remove, or edit individual editing effects.
You can see and edit each edit using the “Edit Stack,” a window that shows all the changes you’ve made.
The latest edit appears on top of the stack.
To delete an edit, touch the Trash icon on the image.
You can use your fingers to pinch in and out to edit individual areas.
Finally, photography of products is the most important task if you sell your products online.
For the same, you must a DSLR camera with a good lens.
You can start with a high-resolution mobile camera as well.
I have tried to cover all the points that help you start product photography.
You can start your photography for products with the least requirements of tools.
You can also study your competitors or famous photography before you start.
It will help you a lot to get started with your photography.