
Let’s be honest—Product Photography Lighting setup is like salt in cooking.
You might not notice it when it’s perfect, but get it wrong, and your photos (or food) are ruined.
Trust me, I’ve been there. My early product shots looked like they were taken in a cave with a flashlight.
But after years of trial and error (and a few burnt-out LED bulbs), I finally cracked the code to a killer product photography lighting setup.
So, let’s dive into the bright world of product photography and save you from the mistakes I made!
Imagine scrolling through an online store. Some product photos look stunning—sharp, clear, and professional.
Others? Well, they look like they were taken with a potato. The difference? Product Photography Lighting.
Good lighting can make a product pop, highlight textures, and create a mood.
Bad lighting can make even the most expensive product look like a cheap knockoff.
Whether you’re shooting for an e-commerce site, social media, or an ad campaign, mastering lighting is a game-changer.
If you’re on a budget, nature is your best friend.
Natural light is free, abundant, and (on a good day) absolutely gorgeous.
But, it’s also unpredictable—thanks to clouds, changing daylight, and surprise rainstorms.
Pro Tip: Shoot near a big window and use white curtains or a diff user to soften the light. Early mornings and late afternoons offer the best soft, golden glow.
For consistency and control, artificial lighting is the way to go. This is where Product Photography Lighting Kits come into play. A good kit usually includes:

While setting up a studio sounds fancy (and a little intimidating), trust me, once you get the hang of it, you’ll never go back.
Best Product Photography Ideas
The Ninja Way!Whether you’re working in a full-blown studio or your dining room, your lighting setup for product photography will make or break your shots. Here are some options:
- One light source: Start simple. A single LED light with a diffuser can do wonders.
- Two-light setup: One light for the main subject, the second to reduce shadows.
- Three-light setup: The pro move—main light, fill light, and a backlight for depth.
If you’re working with a limited budget and space, don’t worry—you can still get professional-looking shots.
Here’s what I use when shooting in my (very cluttered) home office:
- Best LED Lights for Product Photography – Affordable and energy-efficient.
- DIY Product Photography Light Box – A cardboard box + white paper = magic.
- Reflectors – A simple white foam board works wonders for bouncing light.
A product photography light box is like a mini photo studio in a box.
It’s perfect for small products, especially shiny ones that reflect everything (yes, including your confused face holding a camera).
If you’re a DIY enthusiast, making a DIY product photography light box is easy:
- Grab a cardboard box.
- Cut out windows on three sides.
- Tape white fabric or paper over the windows.
- Place a light source outside each window.
- Boom! You’ve got a homemade light box.
Ah, the golden question! The answer depends on what you’re shooting:
- Soft light – (diffused LED or softbox) for fashion, beauty, and shiny products.
- Hard light – (direct, without diffusion) for a dramatic, edgy look.
- Best Light for Product Photography? – A combination of natural and artificial lighting usually works best.
If you want an easy answer, invest in a Product Photography Lighting Kit that includes adjustable LED lights.
They’re versatile and work for almost everything.

Lighting is a crucial part of product photography.
It can make or break the final image. Getting it right can save you a lot of post-production time.
The best way to get consistent lighting is to experiment with various camera settings, including ISO, shutter speed, and aperture.
Before start with shoot make sure to use best camera for product photography around you.
It can also be helpful to use a tripod, which will give you super-crisp images.
Studio lights come in three main types: Tungsten, Florescent, and LED. Each of these types has its own advantages and disadvantages.
You can find a studio lighting kit that meets your specific needs.
However, you should bear in mind that studio lights require a power source, so you’ll need to make sure your space is equipped with outlets.
A triangle setup is another popular setup that lets you create a different look.
The back lights in this setup aim at the wall, the product, and the backdrop.
Alternatively, a separation setup is used where the back lights focus on a different side of the subject.
This will result in a diffused light that bounces off of the subject.
Also, you can choose to use natural lighting from a window, which can result in a stunning product shot.
However, to prevent the light from reaching your subject, you can use a light curtain or drapes.
Another essential studio lighting tool is the soft box.
This lighting tool is used to help you enhance small details of products.
It’s ideal for portrait product photography and also works well with white quality diffusers.
Continuous Lights are a great option for product photography.
The continuous lighting source can be positioned close to the subject, yet is long enough to provide illumination for a long shoot.
These lights also feature dimmer functions, which can help photographers control the amount of light on their subjects. They are also very energy efficient.
Continuous lights are typically mains-powered, but make sure to check whether or not they come with battery mounts.
The Godox ML60 is a good example of a continuous light kit that comes with batteries and an adapter.

You should also look for accessories that can be attached to the continuous lighting fixture.
One of the advantages of continuous lights for product photography is that they allow you to see your subject’s movement without having to freeze it or blur it.
While some products require movement, the vast majority of product photographs will be static.
Therefore, the photographer will not have to worry about blurring or freezing movement, because they will likely be in a studio.
External Flashes for Product Photography are used to illuminate your subject and give it a soft, even glow.
They can be angled or pointed away from the subject.
They can be connected to your camera with a wired or wireless connection.
Be sure to select a cable that is compatible with both the flash and camera.
Many flashes have proprietary connections. Others support standardized connections.
Manual flashes are an option for photographers who want to control the flash power themselves.
This type of operation allows you to control the amount of light and exposure time and is perfect for creative use.

You will become more comfortable with manual flash operation as you practice.
You can also opt for automatic flash metering, which uses TTL (time-of-flash) technology to calculate the correct exposure automatically.
Another option for photographers who are on a budget is a modeling lamp.
This type of flash helps photographers see and control light sources and help to fine-tune the lighting for a specific product.
Unlike a camera flash, modeling lamps do not produce a sufficient amount of light to properly light a product, but they can still be a useful option.
The most important thing to consider when choosing an external flash is how much power it requires to make the desired light.
Normally, the higher the number of f/stops, the more powerful the flash.
If you’re taking product photos, it’s crucial that you use the right lighting.
Natural sunlight is one of the most reliable sources of lighting, but it’s difficult to control and can produce inconsistent color balance and brightness.
You’ll get the best results on overcast or very cloudy days, when the light will be more evenly diffused.
Backlights can also help to bring the subject forward and create a flattering halo around it.
In addition to continuous lights, external flashes can be used to add more dramatic lighting to a photograph.
These flashes are wirelessly connected to your DSLR and are positioned off-camera.

If you’re taking product photos, it’s crucial that you use the right lighting.
You can experiment with different illumination parameters, but there are a few basic approaches to product photography.
There are a variety of lighting setups, some of which are better than others.
A direct front light setup is one of the easiest to achieve.
This lighting arrangement uses a high-output light bulb to provide an evenly distributed and bright light.
This setup should be used in conjunction with a fast lens, so that it doesn’t distort the image.
A front light setup can create some unique effects.
When done correctly, it can be very flattering. It also minimizes shadows and unwanted castoffs.
But be sure to keep a standard distance from your subject.
Photographing reflective products can be a tricky challenge, even for experienced photographers.
The colors, textures, and logos of reflective products need to be properly captured in order to convey the desired effect.
Using an even light setup will improve the overall appearance of your website imagery, and avoid distracting shadows.
The first step is to position two light sources at right angles to the product.
This will eliminate reflections on both sides of the product and on the body of the product.
Another important step is to keep a white rolled-up piece of paper under the product.

A Three Lights setup for product photography is a great way to make your photos look more realistic.
The lighting of your subject is key, and three lights will provide the right amount of light to bring out all the details.
Ideally, you should place one light at the front of the product and two on either side.
This way, you can place them at the right angles and emphasize the form of your product while minimizing the shadows.
Backlights can also be used on the rear backdrop to bring your subject forward, and can also create a flattering halo.
This lighting arrangement is particularly useful when you are photographing small items.

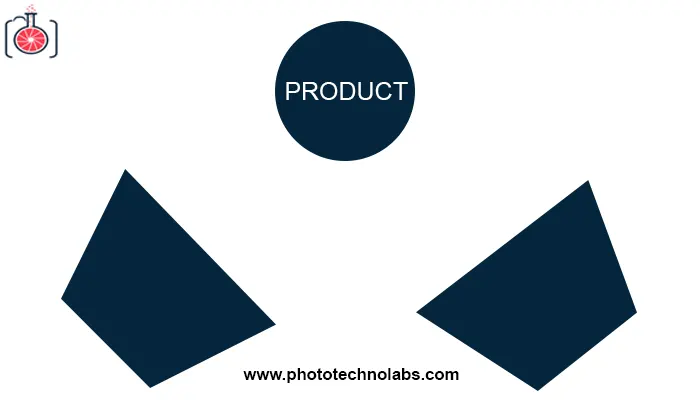
A Triangle Lights setup can produce the 3-D effect you need for your product photography.
It consists of one light in front of the subject and two angled lights on either side of the back of the product.
This arrangement creates a clear separation between the subject and background, making it easier to draw attention to the subject and make it stand out.
This setup is popular among photographers of portraits and still life subjects.
A Triangle Lights setup works best when the lighting is even and diffuse.
When used properly, these lights can help to eliminate the flat look of products.
They are generally adjustable and can be used for different lighting situations.
It is ideal lighting setup for product and lifestyle photography.

When it comes to product photography, there are three basic lights you should have on hand: key light, fill light and backlight.
These lights help separate the background and the subject of the image. They can also add depth to the photo.
The key light is the main source of lighting.
It should be placed at a 45-degree angle on either side of the camera. It is also the brightest light in the scene.
The second light is usually a reflector. It helps balance the intensity of the strobe light.
It is a good idea to place it on the left, to add soft light from the left side of the product.
The backlight, or rim light, is used to separate the product from the background.
It creates a silver lining around the object.
This is a great way to establish character traits and give depth to your images.

Ring lights are one of the best lighting options for product photography.
They are a great way to get an even light distribution, which is important for working with live models and products.
They may cost more than other options, but they can help you get the best results.
They are also very easy to use.
A ring light helps distribute light around a product, and can also help you identify shadows.
Lighting is very important when photographing products, because different products photograph differently.
It is best to use underexposure when photographing brightly colored items.
For those products that are not as colorful as other items, an overhead light can provide the extra fill that you need.
You can purchase adjustable heads for ring lights, which will allow you to position the light upward or downward.
Product Photography Backdrops Ideas
Even with the perfect Product Photography Lighting, raw images may still need adjustments.
This is where ecommerce product photo retouching services come in. No matter how well-lit your shot is, minor tweaks can enhance the final image.
Editing helps correct colors, remove dust, and refine textures. If you’re comfortable with tools like Photoshop or Lightroom, basic adjustments like brightness, contrast, and sharpness can elevate your images.
For professional e-commerce photography, advanced retouching ensures that products look flawless, vibrant, and true to life.
- Fixes minor lighting imperfections.
- Enhances colors and sharpness.
- Removes unwanted reflections or dust.
Mastering Product Photography Lighting takes practice, patience, and the right tools.
Whether you’re using a fancy studio lighting for product photography setup or just a window and a DIY product photography light box, great lighting is possible for everyone.
So, grab your camera, set up your lights, and start shooting. And remember—bad lighting is like bad coffee; avoid it at all costs! ☕📸
Product photography requires the proper use of lighting.
Proper lighting will allow you to instantly illuminate the entire scene and capture the product in its most flattering light.
The right lighting will also ensure that all details are visible and no harsh shadows form.
There are several different techniques you can use to set up lighting for your product photographs.
The first step in setting up lighting for product photography is to test the lighting.
You should run several test shots and view them on a computer monitor to determine if you have any problems with lighting.
When taking photos of products, it’s important to consider the type of lighting you need.
Generally, you want to avoid overexposed photos, while bright light should produce an even, natural look.
But don’t worry – there are several options.
Try a single continuous soft box light, a reflector, or a dedicated photo studio.
The sun is one of the most reliable lighting sources, but it’s difficult to control the brightness and color balance.
Even if it’s bright and sunny outside, the sun can produce uneven light and create hard shadows.
If you can, shoot on a cloudy day to create diffuse light that’s even.
If you’re looking to take great product photos, lighting is crucial.
It can make or break an image, and you can’t just set a flash on a tripod and hope for the best.
The trick is to use natural light wherever possible, which can vary greatly throughout the day.
Try using a large window or a white sheet against a wall, as these are great options for natural lighting and soft shadows.
Natural light is the best option for product photography, as it gives the most lifelike photos.
But if you can’t afford to hire a professional, you can do it yourself with a home studio and some electric light sources.
For best results, product photography should be lit with multiple lights placed at various angles.
Lights should also be bounced off white styrofoam boards or placed in triangles to create even lighting across the product.
You can also use natural light to create the desired effect.
Natural light can be tricky to photograph, as it varies from minute to minute.
As the sun moves throughout the day, it changes the natural light coming in through windows.
Photographers must constantly monitor changes in the light throughout the day to achieve the best possible results.
If you want to make your products look irresistible, then you need to use the right lighting.
LED lights are a great way to achieve this.
You can adjust the temperature and intensity of the light to give you the effect you’re looking for.
You should also consider using light modifiers.
These include flags, shoot-through umbrellas, and diffusers.
These add a little extra sparkle to your pictures.
You can use them to emphasize specific features of your product, or to create a mood.
You can also position them in a way that flatters your subject.
The best LED light panels offer the flexibility to adjust the light’s colour temperature.
They are also easy to use. They will last a long time.
When photographing products, it is important to use the right lighting.
High-quality lighting produces a uniform, well-balanced light.
A bright light can wash out the colors and produce an unpleasant image.
To choose the right lighting for your product photography, consider its color temperature.
The wrong color temperature can lead to unhappy customers.
The lighting of your product photography should accurately depict the product.
This means that the product’s colors are true and the angles are correct.
Choosing the right light will also allow you to get a high-resolution image with crisp details.
When photographing products, it is important to use the right lighting.
They can be set up close to your subject to create the desired effect.
They are available in a variety of shapes and sizes to accommodate your lighting needs.
A large box can cover a larger area, while a small one is more portable.
Choosing a soft box depends on your specific lighting needs and personal preferences.
For example, if you’re shooting a product with a high-contrast surface, a square soft box will create a pleasing octagon.
On the other hand, a rectangular soft box will create rectangular specular highlights, which won’t look as natural.
In product photography, shadows and light play a huge role.
If you’re not familiar with these concepts, you can consult a professional photographer, ask them for tips, or learn about the different lighting setups.
In this article, we’ll examine how different types of lighting affect different types of products.
First, you should understand that different products require different types of lighting.
A sunlit photo might look overexposed, while a shot taken under artificial light will be more even.
It’s important to experiment with the type of light you use for each product.

Ron Jonas
About Author
Hi there, I’m Ronald Jonas – A photography specialist, Blogger. Portland, Oregon Area, USA.